 |
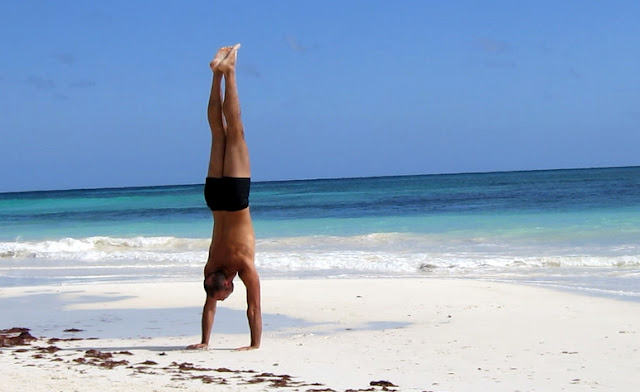
| A perfect handstand |
One of the main aims of many of those who come to bodyweight training is to learn how to do a handstand.
Freestanding handstand is an impressive skill that demonstrates a high level of strength and control and it will require many hours of practice before you can hold the position for any length of time.
There are many ways to do a handstand but the variation is discussed in this guide is the straight line handstand. It has many benefits over other variations such as
- Shoulders are open up
- Encourages a stronger, tighter core
- Strengthens the legs and butt
- Protects the back
 |
| Straight handstand vs Arched handstand |
Preparation before Handstand practice
Before jumping right into a handstand, it’s important to get your body ready for the work ahead.
The two areas that will take the brunt of the force when you’re upside down are your wrists and your shoulders.
No matter what type of training you’ve been doing until now, there isn’t really an equivalent exercise that stacks your entire bodyweight directly on your shoulders and wrists. So you’ll have to make sure these joints are good and ready to handle handstand training.
Here are 2 exellent videos demonstrate how to prepare for your wrists and shoulders by GMB fitness
The Hollow Body Position for Core Strength and Control
The core of the straight line handstand is the hollow body. It’s important to practice this position on the floor, not only for core strengthening, but also to get a feel for the position you should be going for when you’re upside down. Spend a lot of time on this drill and you’ll get a lot of benefit.This video by GMB shows you several variations on the hollow body hold.
Hand Position
The hands should be shoulder width apart, with the fingers splayed wide.One of the common mistakes is keeping the fingers too close together, which creates a narrower base and makes it much more difficult to balance.
Shoulder Position
The ideal position for the shoulders in the straight line handstand is for them to be fully elevated and hugging your ears.
To get a feel for this position, it can be helpful to stand on a strength band (or tubing) and push your hands overhead as much as possible, attempting to squeeze your shoulders to your head.
Once you start practicing handstands and paying attention to the little details, you’ll see how the elbow position is integral to getting the shoulders into the right position too. If you flare your elbows out, your shoulder blades will want to come together, when they should be lifted up towards your ears.
Lower Body Position
The lower body is the most overlooked part of the handstand because, at first glance, it doesn’t seem like it’s really involved.In reality, the lower body plays a big role in the handstand. After all, that’s most of what your hands and shoulders are supporting, so it better be in the right position!
Now, remembering the proper position for the lower body is easy. It’s just: SQUEEZE, SQUEEZE, SQUEEZE.
Your feet should be together and pointed, and your legs should be squeezed together as tightly as you can muster. Tighten your butt and reach your feet to the sky.
How to Breathe in a Handstand
Breathing may not exactly be part of your body position in the handstand, but it is extremely important, and can certainly affect how you hold yourself.
The best way to breathe in a handstand is to do so naturally, but that’s not as easy as it sounds.
This video by GMB shows some tricks you can use to make sure you’re breathing, and that you’re not going past your breaking point.
Handstand Progression
Now that you understand the proper body position for the handstand, and how to build your awareness, let’s get into the progression to get a perfect handstand.Every person is going to be different and, depending on your background, you may be spending more or less time on each progression before moving on. The important thing is to keep working on the level you are at until you feel very comfortable.
1. Crow stand
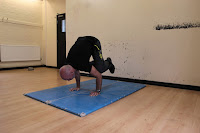 |
| Crow stand - Frog stand |
You should be able to hold the position for 1 min before you start working on your handstands.
2. Hollow body hold
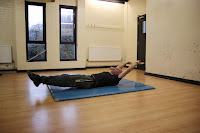 |
| Hollow body hold |
You should be able to hold this position for 1 min before you start working on your handstands.
3. Headstand
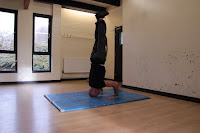 |
| Headstand |
Once you have mastered the hollow body position, kick into a headstand, and engage your core muscles so as to maintain this 'hollow body' when inverted. Build up to a minute in the headstand position.
This drill will challenge your balance and engage your core muscles. Start with your head on the ground and your legs straight, feet together. Raise your legs under control till vertical, then lower again under control.
4. Pike to headstand
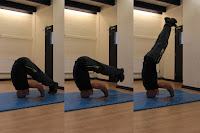 |
| Pike to headstand |
5. Handstand against wall
 |
| Handstand against wall |
Try to generate as much tension as possible by engaging your core and straightening your body.
Build up to one minute in this position before proceeding to the next step.
6. Wall handstand with one leg off the wall.
 |
| One leg Wall handstand |
Build up to one minute in this position.
7.Off the wall freestanding handstand.
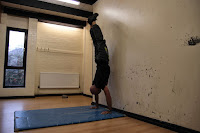 |
| Off the wall Handstand |
8. Kicking up into a freestanding handstand.
 |
| Kick up into handstand |
This is usually done as a dynamic motion. Plant one leg on the grounds, and put your hands on the ground in front of it. Kick up with your other leg, then allow your first leg to follow the second.
If things go wrong and you cannot find a point of balance at first, simply roll forward, or pirouette out.
Aim for 4 or 5 consistent holds of 15s at first, with a minute rest in between. Then build up to 2 holds of 30s ; one of 45s and one of 15s. And finally aim for a full hold of one minute!
9. Free handstand
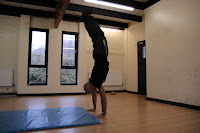 |
| Free handstand |
Summary
Key Points for Successful Handstand Practice:
The best rule of thumb for handstand practice is: the more often you can practice, the better. So even if that means just 10 minutes a day, that’s better than practicing less frequently.
If you can, I recommend setting a timer for 30 minutes, and practicing as much as you can with good form. That does not mean practicing for 30 minutes straight, but rather, doing a couple of attempts (or holds, depending on what level you’re at), then resting as needed before going back to it.
Using Greasing the Grove (GTG) method will keep you relatively fresh throughout your session.
Wear socks and go into a chest-to-wall handstand with your hands 1-2ft away from the wall. Slide the feet down into a tight tuck and extend them back up. Repeat. Start with 3 sets of 3-5 reps for starters. Again, socks are awesome for this to help you slide.
- Always warm up your wrists and shoulders before practicing handstands.
- Pay attention to your body positioning and breathing.
- Start with the basics – Wall work may not be sexy, but it’s effective.
- When you’re ready for freestanding work, first practice bailing out.
- Take your time and don’t rush to meet arbitrary standards.
Frequently Asked Questions
How Long and How Often to Practice?
When it comes to handstand training, I don’t like to make specific sets/reps recommendations, since everyone will be starting from a different place, and face different challenges along the way.The best rule of thumb for handstand practice is: the more often you can practice, the better. So even if that means just 10 minutes a day, that’s better than practicing less frequently.
If you can, I recommend setting a timer for 30 minutes, and practicing as much as you can with good form. That does not mean practicing for 30 minutes straight, but rather, doing a couple of attempts (or holds, depending on what level you’re at), then resting as needed before going back to it.
Using Greasing the Grove (GTG) method will keep you relatively fresh throughout your session.
Why do stomach-to-wall handstands?
You're more likely to get an arch in your back when doing back-to-wall handstands, while stomach-to-wall handstands force you in the proper alignment, which will save you a lot of trouble in the long run.
Can I just skip the chest-to-wall version and go straight to back-to-wall HS practice?
The back to wall version will make your back curve and that is a difficult habit to have to undo later on down the line. The chest-to-wall version helps you get good at generating full body tension (especially your LEGS) while in the RIGHT position. Plus, it will naturally open up your shoulders the closer you get your wrists to the wall. If it’s scary to come down, don’t stay in the chest to wall HS until failure so you could walk it out or practice the pirouette bail. When you’re comfortable with the chest to wall version, it’s a good idea to practice BOTH chest and back to wall in a session.When I try to tuck up with both feet up at the same time, I can barely get my hips over, and can’t straighten the legs with control, what do I do?
Well, that’s totally normal. The tuck up isn’t easy and extending the legs can feel quite difficult so try this drill that helped me a lot:Wear socks and go into a chest-to-wall handstand with your hands 1-2ft away from the wall. Slide the feet down into a tight tuck and extend them back up. Repeat. Start with 3 sets of 3-5 reps for starters. Again, socks are awesome for this to help you slide.
Comments
Post a Comment